
Using Of Wireshark

Learning how to use a sniffer effectively is probably one of the most important network-related lessons you can take, and I strongly recommend that practiced as much as possible.
- Peeking at a Sniffer
Let's begin by peeking into a Wireshark capture file. This capture was taken as I ran dhclient eth0 and
then opened my browser and browsed to http://www.offensive-security.com(This is most lovely site to learn Hacking).
Looking at this for the first time might be overwhelming. However, take a deep breath, examine the
packet capture line by line, and implement your knowledge of TCP/IP.
Packet 1: DHCP Request. You ran dhclient, which broadcasts a DHCP request to a local DHCP server.
Notice the broadcast destination address 255.255.255.255 and the source IP address 0.0.0.0.
Packet 2: A DHCP server (192.168.1.1) replies in a unicast packet and assigns the IP 192.168.1.107. At
this point the browser was opened, attempting to browse to www.offensive-security.com.
Packet 3: ARP Broadcast. You've attempted to send a packet to the Internet, and before your
computer can actually send it, it needs to identify the default gateway on the local network. The
default gateway IP address is configured on the requesting machine, but the default gateway MAC
address is unknown. My machine sends a broadcast to the whole network, asking, “Who has
192.168.1.1? Tell 192.168.1.107.”
Packet 4: All computers on the local subnet receive this broadcast and check whether 192.168.1.1
belongs to them. Only 192.168.1.1 responds to this ARP broadcast and sends an ARP unicast reply to
192.168.1.107, informing it of the MAC address requested.
Packet 5: Now that your computer knows where to send its packets in order for them to reach the
internet, you need to resolve the IP of www.offensive-security.com. Your computer sends a DNS
query to the DNS server defined in your TCP/IP settings (24.224.127.143) and asks the DNS server for
the IP address (A record) of www.offensive-security.com.
Packet 6: The DNS server replies and tells your computer that the IP address for www.offensive-security.com is 208.88.120.8.
Packet 7: Armed with this information, your computer attempts a three-way handshake (remember
that buzzword from TCP/IP?) with 208.88.120.8 on port 80 and sends an SYN request.
Packet 8: The web server responds with an ACK and sends an SYN to your machine.
Packet 9: You send a final ACK to the web server and complete the three-way handshake.
Packet 10: Now that the handshake is complete, your computer can start talking with the service
using a specific protocol. Since you're using a web browser, your computer sends an HTTP GET
request, which retrieves the index page, and all linked images, to your browser.
Packet 11: – end: The main page of www.offensive-security.com, including all linked images, is
loaded
in your browser.
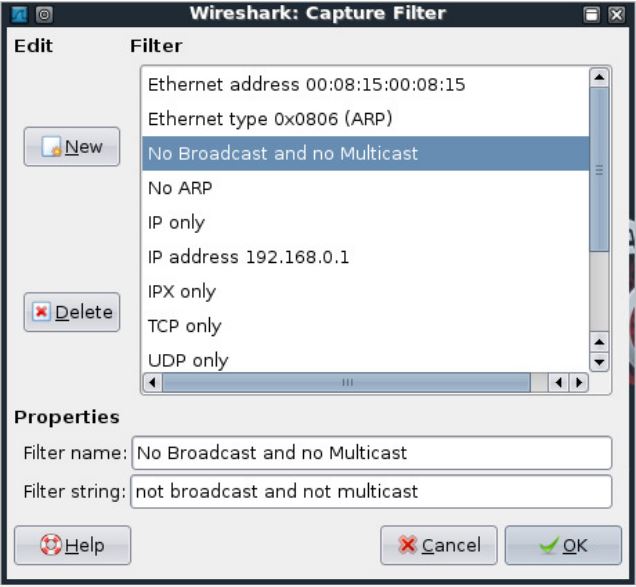
Capture and Display Filters (CDF)
Capture dumps are rarely as clear as this since there is usually a lot of background noise on a network.
Various broadcasts, miscellaneous network services, and other running applications all make life
harder when it comes to traffic analysis. Wireshark has two very convenient filter schemes: capture filters and display filters. Understanding
how to use these filters is a recipe to conquering Wireshark.
Following TCP Streams
As you may have noticed, packets 9–end are a bit difficult to comprehend because they contain
fragments of information. Most modern sniffers, Wireshark included, know how to reassemble a
specific session and display it in various formats.


0 comments:
Post a Comment